Thinkpad is an awesome line of laptops ~~for Windows users.~~ Despite the fact that Lenovo already joined Linux Vendor Firmware Service , many drivers for many Thinkpad laptops are lack of Linux support. This post is a painful guide to use fingerprint on Thinkpad T470 for Ubuntu 16.04 users (Gnome3).
 Note : Before go through this post, check this link https://fwupd.org/lvfs/devices as Lenovo may upload drivers in the future. Also use lsusb to check your Sensor ID, only 138a:0097 and 138a:0090 are supported now.
Tl;dr:
1. Install official driver from Lenovo on a Windows 10 64-bit Virtual Machine. 2. Use Windows 10 Hello Fingerprint to store fingerprint data in Sensor Memory. 3. Check out with prototype from https://github.com/nmikhailov/Validity90 to make sure Ubuntu can now detect Fingerprint Sensor. 4. If ok, install pam_fprintd.so (tested with Gnome 3) as:
* 138a:0090: <https://github.com/3v1n0/libfprint>
 * 138a:0097: <https://github.com/hrenod/libfprint>
5. Register fingerprint (again) with fprint-enroll using the same one as Step 2. 6. Add pam_fprintd.so into PAM configuration files (/etc/pam.d/): login , su , sudo ,…
Detail:
1. ### Install Lenovo official driver on a Windows 10 64-bit VM.
Download Windows 10 ISO from: https://www.microsoft.com/en-us/software-download/windows10ISO This guide using Virtual Box to create VM. Before creating VM, you have to check some requirements:
* To share your fingerprint device with VM, you have to ensure VirtualBox extensions (required to support USB 2.0 & 3.0) installed.
Go to File > Preferences > Extensions to check if it was installed, if not check your Virtual Box version (Help > About Virtualbox), then download & install suitable extension version via: https://www.virtualbox.org/wiki/Downloads.
* Also, add your user to group vboxusers:
sudo usermod -a -G vboxusers your_username Then now you can create VM with PAE & USB 3.0 enabled. After setup VM, download & install Lenovo driver via: https://pcsupport.lenovo.com/us/en/products/laptops-and-netbooks/thinkpad-t-series-laptops/thinkpad-t470p/downloads/ds120295 Use Device Management to make sure driver installed. 
2\. Use Windows Hello Fingerprint to store your fingerprint data in sensor memory.
Open Start Menu, search for Sign-in Options , then click Windows Hello Fingerprint  After setup fingerprint data, you can now shutdown VM.
3\. Check out with nmikhailov’s prototype:
Install requirement:
sudo apt-get install make gcc libgcrypt-dev libglib2.0-dev libnss3-dev libusb-1.0-0-dev libssl-dev libpng-dev libgnutls28-dev policykit-1-gnomeClone prototype from: https://github.com/nmikhailov/Validity90
git clone https://github.com/nmikhailov/Validity90
cd Validity90
make
make permissions
Then, run prototype:
./prototypeIf everything ok, you will receive something like this:
Prototype version 15
Found device 138a:0097
...
IN: 2c941bf6930a75272f37688007b294d5d1f1caf5ec817653bdcb0d7757b3cb28
OUT: 9feb78c882501f8f934a511fdd043b40208e936e28878d3bd5e435f8766e72f9
1 - Scan fingerprint
2 - Test leds
0 - Exit
Choose 1 and scan your registered fingerprint. If match, it will result like this:
Fingerprint MATCHES DB Finger id: 2!If you get permission denied error, do
sudo chmod a+rwx /dev/bus/usb/your_device_path
sudo chmod a+r /sys/class/dmi/id/product_serial
4\. Create pam_fprintd.so
* 138a:0090:
sudo add-apt-repository -u ppa:3v1n0/libfprint-vfs0090
sudo apt-get update
sudo apt-get install libpam-fprintd libfprint0
* 138a:0097:
git clone https://github.com/hrenod/libfprint
cd libfprint
./autogen.sh
make
sudo make install
5\. Register fingerprint (again) with fprind using fprint-enroll
fprintd-enroll your-usernameExample:
congtt@vngcloud:~$ fprintd-enroll congtt
Using device /net/reactivated/Fprint/Device/0
Enrolling right-index-finger finger.
Enroll result: enroll-completed
Remember using same finger as previous step. Verify by fprintd-verify, example:
congtt@vngcloud:~$ fprintd-verify
Using device /net/reactivated/Fprint/Device/0
Listing enrolled fingers:
- #0: right-index-finger
Verify result: verify-match (done)
6\. Edit PAM configuration files:
Note: backup original version before you make any changes.
* /etc/pam.d/sudo , /etc/pam.d/su & /etc/pam.d/login : add the following line at top of each files
auth sufficient pam_fprintd.so* /etc/pam.d/common-auth :
auth [success=2 default=ignore] pam_fprintd.so max_tries=3 timeout=30 # debug
auth [success=1 default=ignore] pam_unix.so nullok_secure try_first_pass
auth requisite pam_deny.so
auth required pam_permit.so
Remember to enable Fingerprint Login in Account Setting. 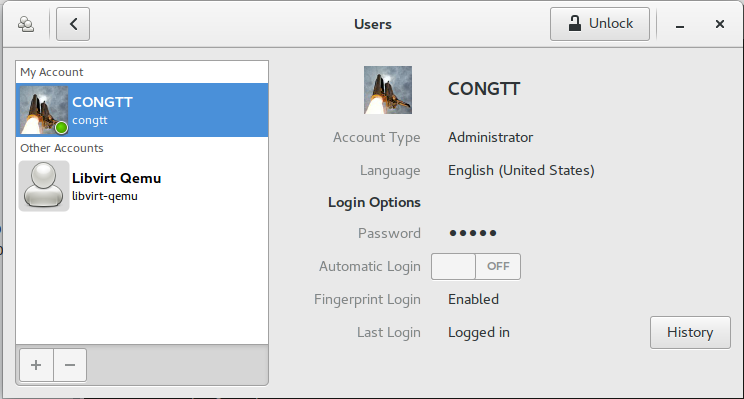 Next time you start your laptop, you will have the screen like my first image.
Known problem:
* Fingerprint still can not bypass gnome-keyring:
Issues at: https://gitlab.gnome.org/GNOME/gnome-keyring/issues/1. Gnome-keyring is a “collection of components in GNOME that store secrets, passwords, keys, certificates and make them available to applications”. After successful login or su, you still have to enter gnome-keyring password to unlock some applications. Workaround is setting gnome-keyring as blank. * Sometime Gnome fails to display after successful authentication:
You will stuck at a blank screen after input your fingerprint. Don’t worry, just open another console using Alt+F1, Alt+F2,… (one of them). Then, login, install ubuntu-gnome-desktop (apt-get install ubuntu-gnome-desktop) again to install missing dependencies. Next time, you may login normally.
Source:
Many thanks for our MVPs:
* https://github.com/nmikhailov/Validity90/ * https://github.com/3v1n0/libfprint * https://github.com/hrenod/libfprint